09 Feb

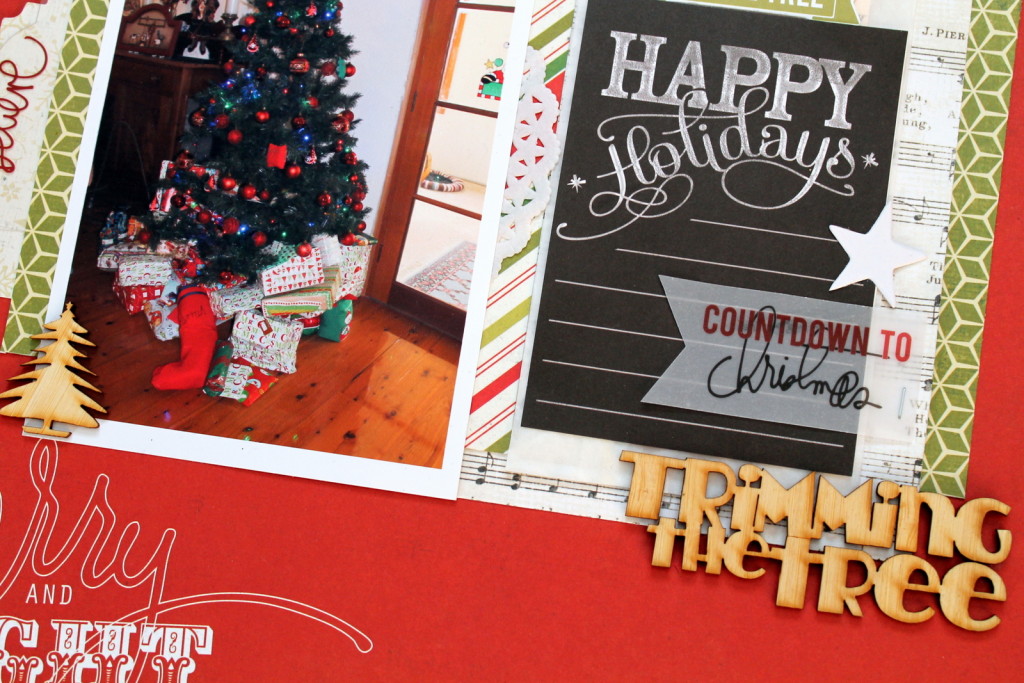
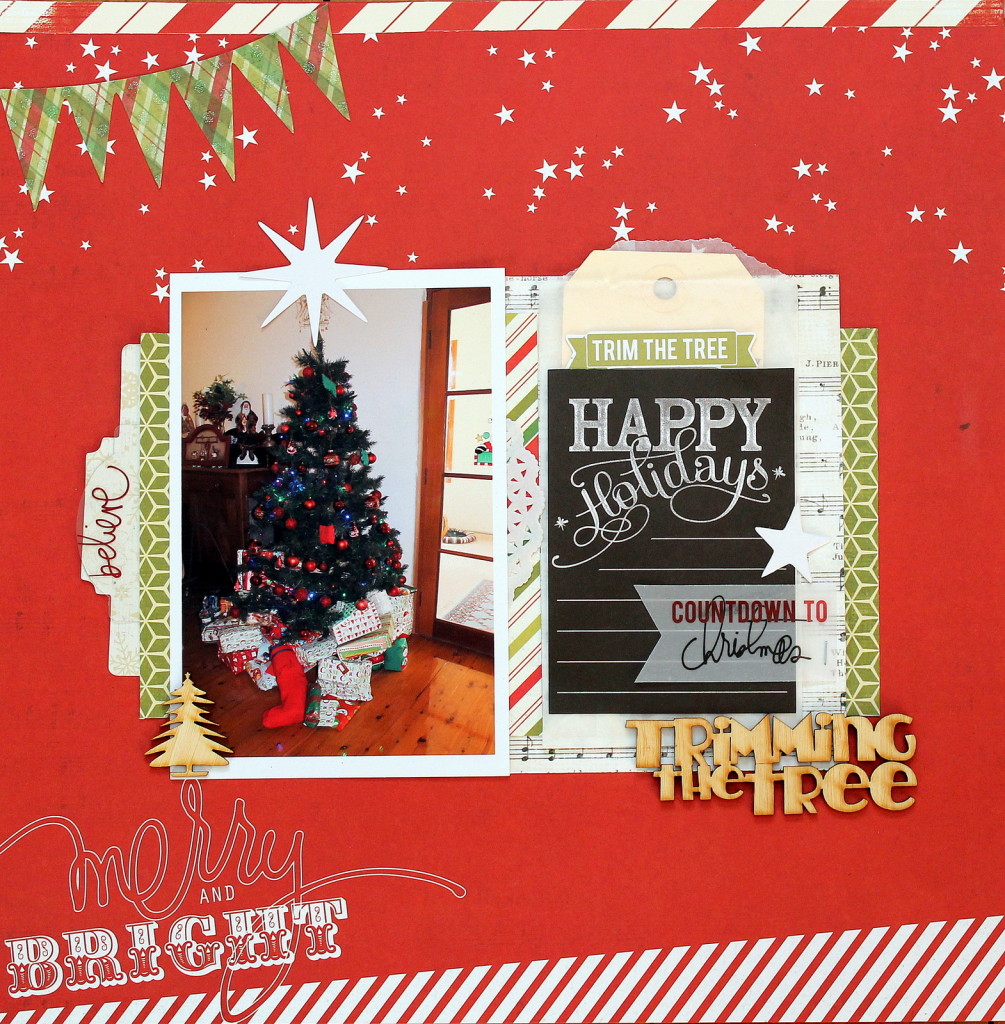
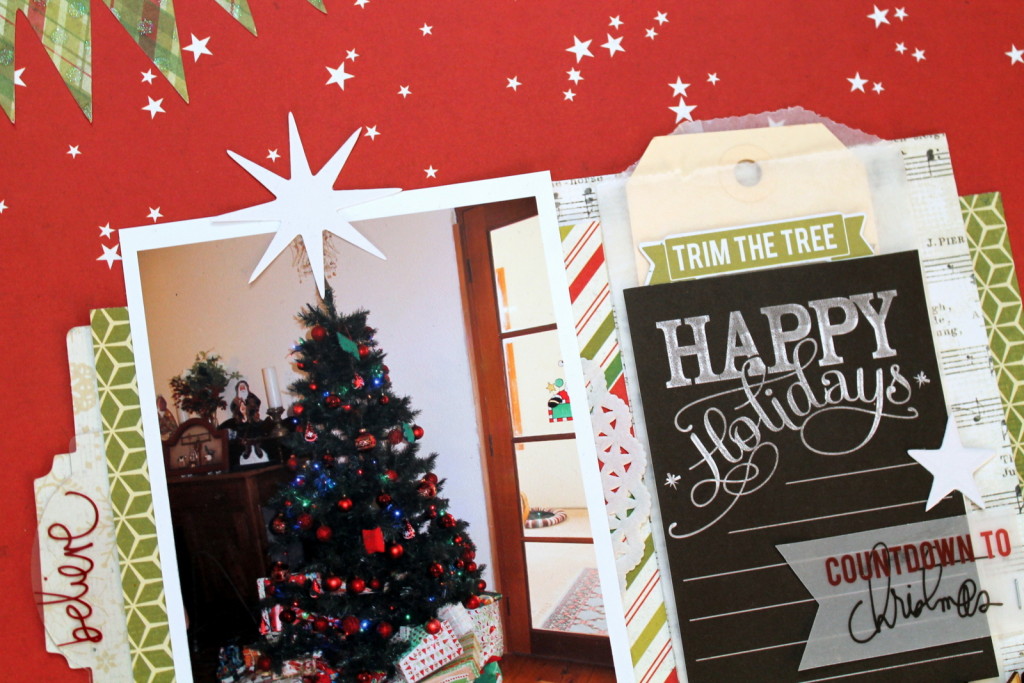
American Crafts Shimelle collection: “Tell My Story”

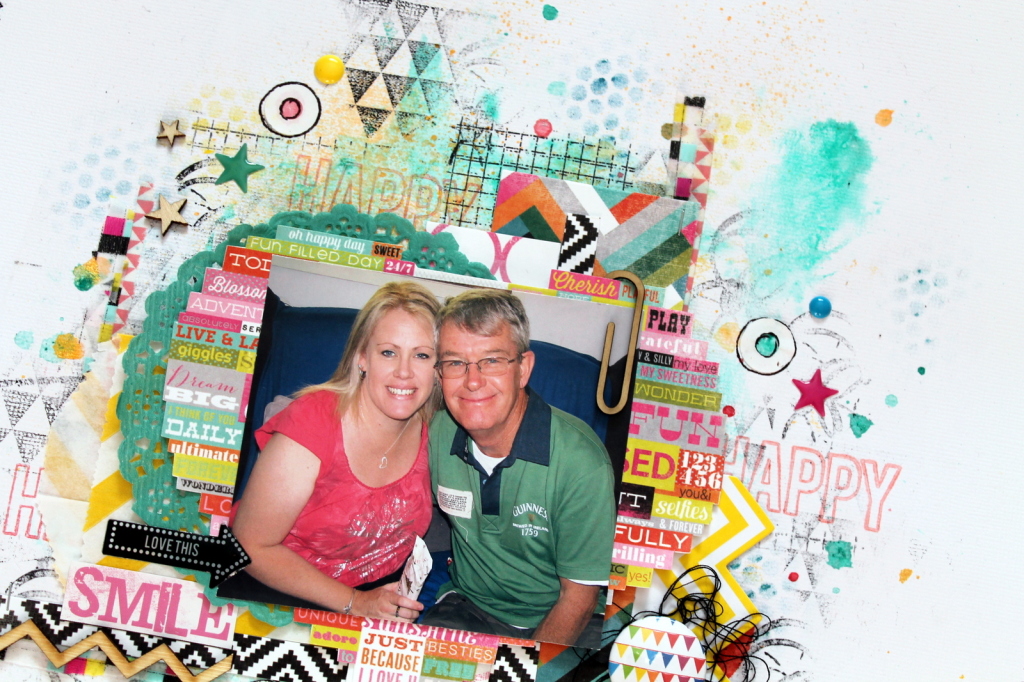
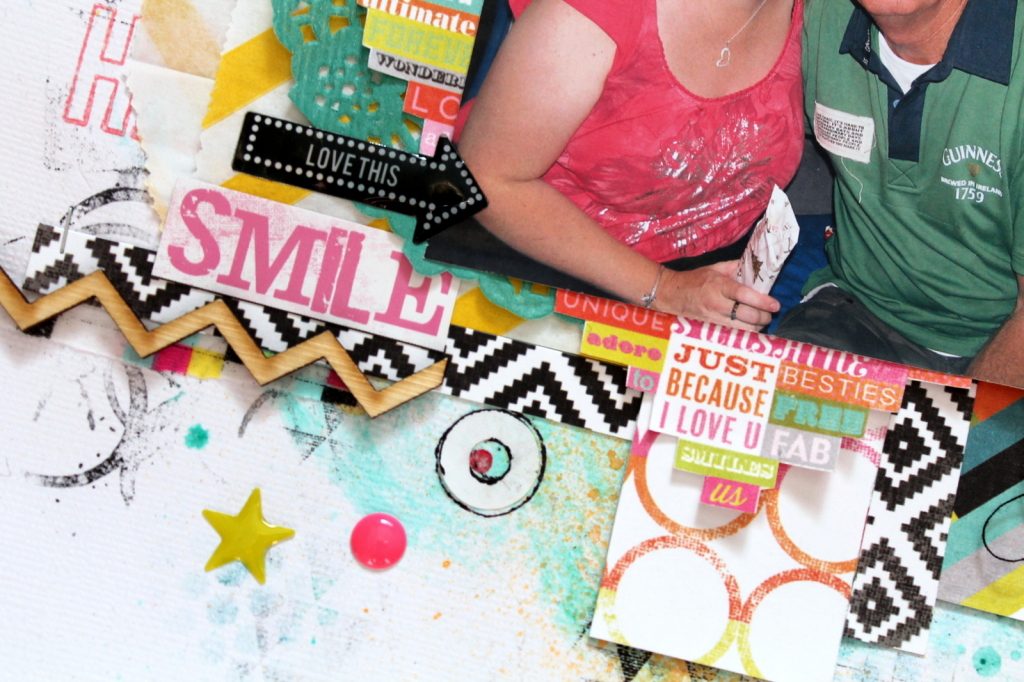
Hi there everyone! It’s Tarrah back with you today to share a recent layout that I created using some cute cut files from here and the gorgeous American Crafts Shimelle range!

Tell My Story: a layout featuring American Crafts Shimelle collection.

I used my Silhouette Cameo die-cutting machine to trace the frames onto white cardstock with the Silhouette sketch pens. (So instead of using the blade to cut them, I popped a sketch pen in its place and it drew them!)

I then took my craft knife to all those X’s and to the middles of the frames to cut those out too.

Tell My Story, Close-up Detail: a layout featuring American Crafts Shimelle collection.

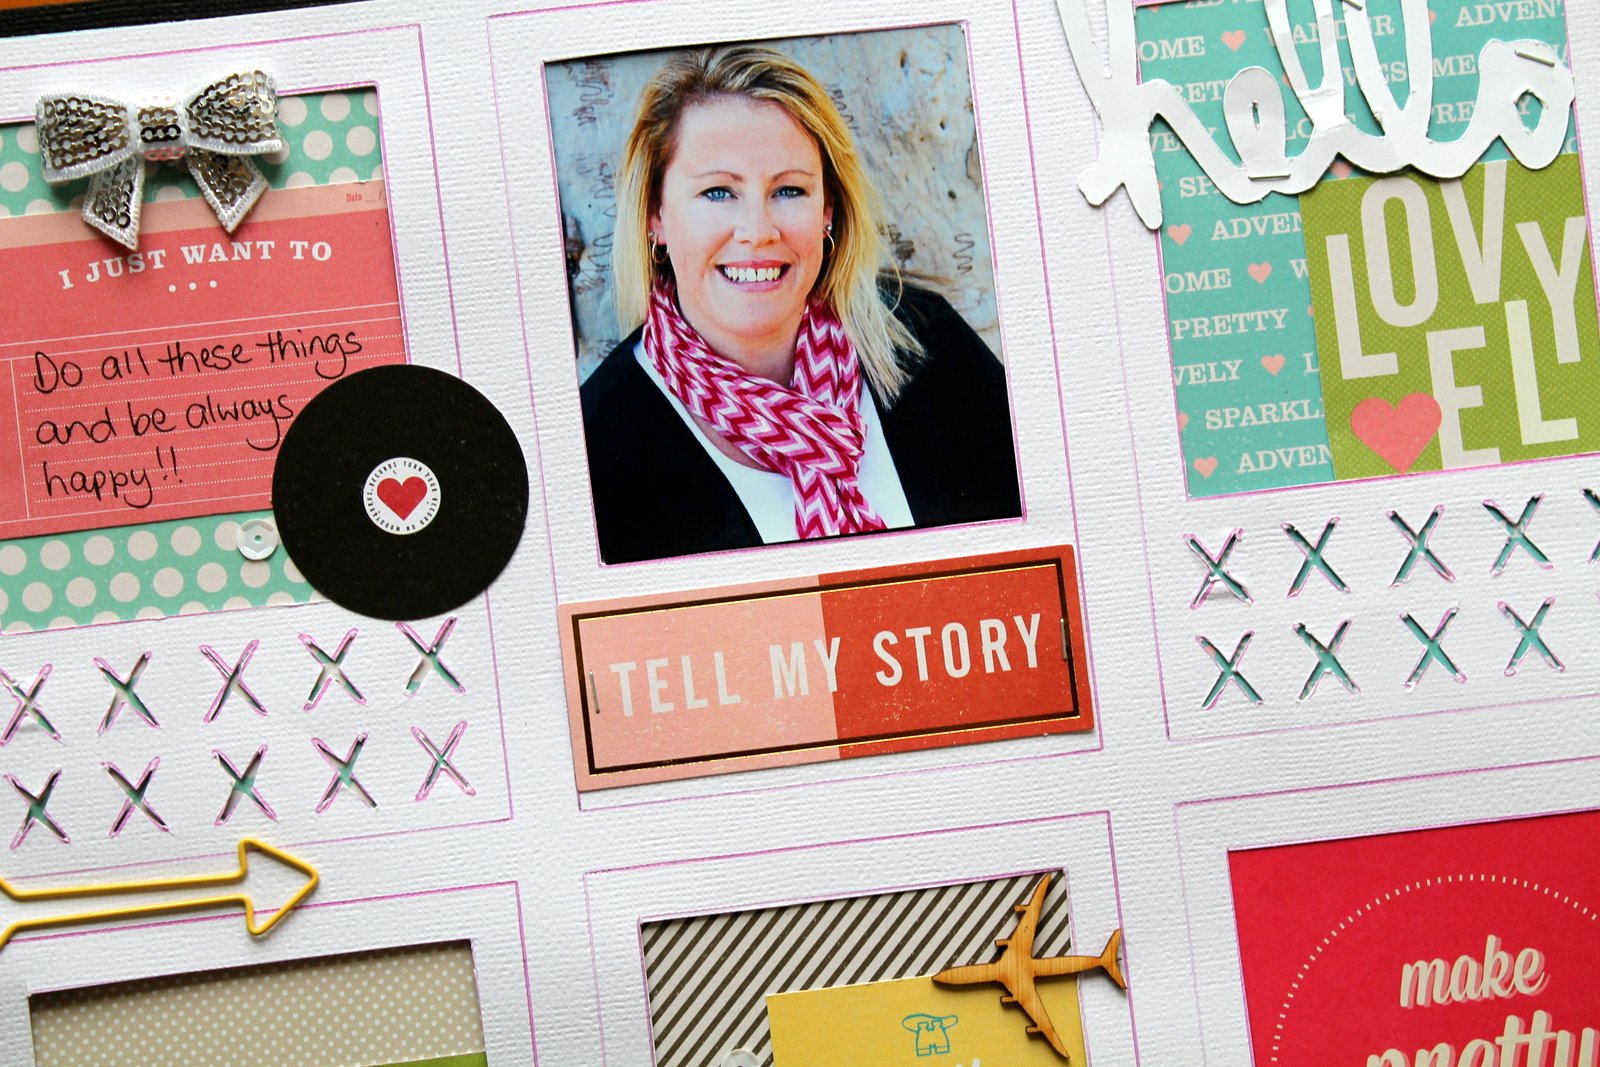
I created this layout to document some of the things I love…things like travel, making pretty things etc etc!

Tell My Story, Close-up Detail: a layout featuring American Crafts Shimelle collection.

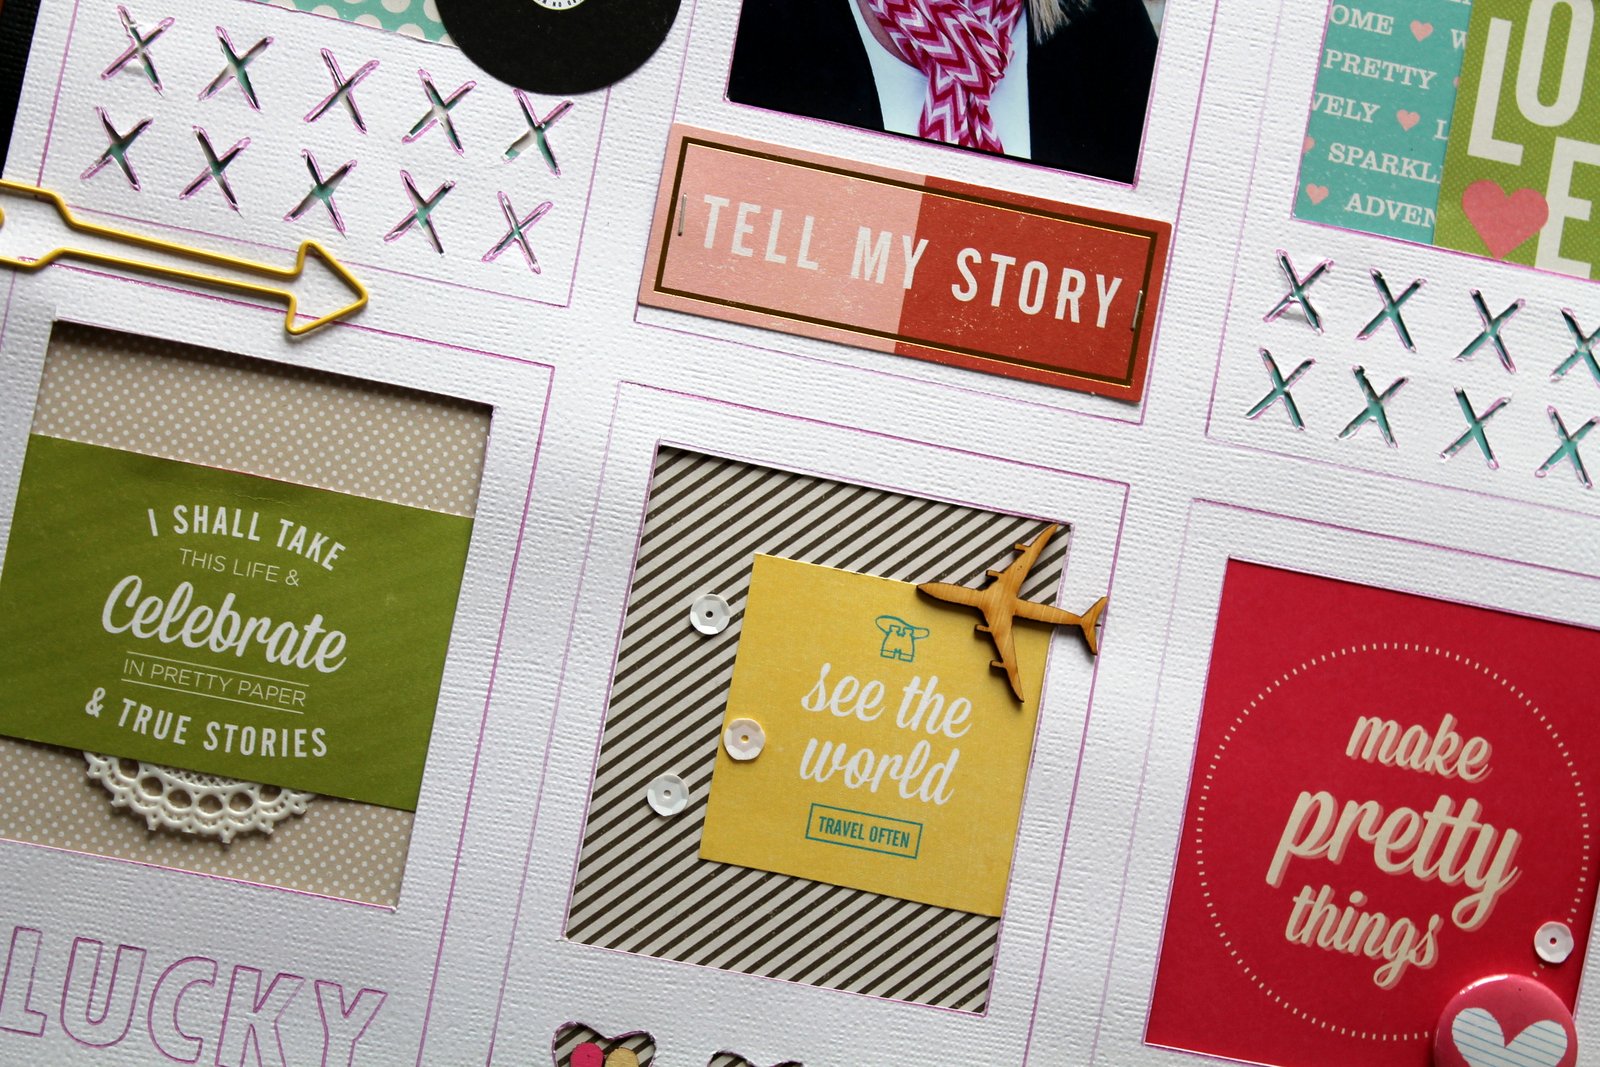
I used mostly Shimelle’s first collection on this layout with a few bits and pieces from PinkFresh Studio as well!

Thanks so much for stopping by today! Happy creating!

19 Dec

Trimming the Tree with Tarrah!

Trimming the Tree Detail

Hi everyone! Tarrah back with you today to share a Christmas themed layout that I created as part of the 12 Days of Christmas Blog Hop! To keep up with the hop and where it lands each day: visit our information page. And don’t forget to join the crop event for chances to win the giveaway prizes.

So where are you in the hop? DAY TWELVE! Make sure you check the blogs that have already provided inspiration.

Monday, 8 December 2014: Papercut Labs
Tuesday, 9 December 2014: A Piece of Cake Designs
Wednesday, 10 December 2014: Kellie Stamps
Thursday, 11 December 2014: Heidi Swapp (via Kim Jeffress)
Friday, 12 December 2014: The Scrappery
Saturday, 13 December 2014: Seriously Scrapbooking
Sunday, 14 December 2014: Maya Road (via Angella Peardon)
Monday, 15 December 2014: Stampin’ Up!
Tuesday, 16 December 2014: Scrapmatts
Wednesday, 17 December 2014: D-lish Scraps
Thursday, 18 December 2014: Studio Calico (via Natalie Elphinstone)
Friday, 19 December 2014: Papercut Labs << YOU ARE HERE

I made a process video while I created my layout also.

I have mainly used the Heidi Swapp ‘Believe’ collection on this layout. It’s one of my all time favourite Christmas collections. I have also added some Christmas themed wood veneer from Words or Whatever Chipboard.

Trimming the Tree

I love to layer all different size and shaped papers to give dimension and add interest. I also add embellishments for extra decoration.

Trimming the Tree Detail

I quite often hide my journaling on my layouts by writing or typing my journaling on to a shipping tag, I then use a pocket or tuck it behind the papers.

Trimming the Tree Detail 2

Thank you so much for stopping by the Papercut Labs blog today…I would like to wish you and your families a very Merry Christmas and a safe and happy New Year!

Tarrah x

10 Dec

‘Just Believe’ Christmas Card Set by Tarrah

Hi there, everyone! Tarrah here with you today, and I hope you are all  getting organised for Christmas? I am very happy to say I am just about ready — thank goodness!

One of the traditions that I like to keep at Christmas time is making some of my own Christmas Cards for some of my close family..

I went looking through my stash of Christmas collections and stumbled across this beautiful one by Kaisercraft called Just Believe. I knew that the co-ordinating papers and embellishments would be perfect for some handmade cards!

Just Believe Christmas Cards

When I create cards, I like to create them with different orientations. Here, I have created two that open from right to left and the other one opens from bottom to top. I like the challenge of decorating the different size and oriented cards.

It is so much easier to create cards if you are using products from the one collection. It takes a lot of the guess work away from you especially if you are limited for time and a lot of us are at this time of year!

Do you create your own Christmas cards? I would love to know if any of you have created Christmas Cards using non-traditional colours! I am certainly not that game, but I love the look of them!

I hope you are getting some to create in between getting organised for the festive season!

Have a great day and thanks for visiting the Papercut Labs blog today!

P.S. Don’t forget there’s a blog hop and crop happening that’s being hosted by Papercut Labs. All information can be found on this page!

01 Dec

Vintage Christmas Tag by Tarrah

Hi there, everyone! It’s Tarrah here with you today to share a cute tag I created recently. I have been scouring Pinterest for some Christmas Craft inspiration lately and I came across this beautiful Christmas Tag created by Karen Shady. I loved the vintage look to this tag!

Created by Karen Shady

I decided to create a Vintage Christmas tag of my own and keeping up with the Papercut Labs 12 Days of Christmas events and challenges, my tag below meets challenge number 12: Must Be Xmas-y!

Products used for my tag:

Ranger Manilla Tag
Heidi Swapp ‘Believe’ Papers and Ephemera
Tim Holtz Vintage Sticker and Mini Staple
Jenni Bowlin Studio Chipboard Button
Words or Whatever Mistletoe Wreath Chipboard
Teresa Collins Stamps
Versacolour and Staz-On Inks
Kraft Bitty Bag
Paper Doily
Grosgrain Ribbon

Vintage Christmas Tag

Created by Tarrah McLean

When I first grabbed the paper doily to add to my tag, I felt it was too white looking so I toned it down a little with some Versacolour Grey ink to give it more of a vintage look. I also inked the edges of the tag and the chipboard wreath in Versacolour Pinecone Ink as well.

I made a process video while I created my tag. You will see in the video that I go to use all different elements on my tag but I end up choosing some different elements and add those instead!

Thanks so much for stopping by the Papercut Labs blog today. Have a great day!

29 Oct

Pinterest Inspired: Handmade Christmas Gifts by Tarrah

Hi everyone! It’s Tarrah here with you today. I wanted to get a start on some handmade Christmas gifts so I went to my number one place for some ideas and inspiration: Pinterest!

These cute magnets caught my eye straight away!

Magnet8Photo Credits: Sei Lifestyle

Supply List:

Scraps of patterned paper
Word Stickers
Rhinestones
Paper Doily
Embellishments
Mod Podge
Circle Chipboard Pieces
Magnets
Sandpaper
Hot Glue Gun
Sewing Machine

Step 1: Gather some of your patterned paper scraps and a little bit of paper doily and lightly adhere a few pieces together into a square shape (making sure that your round chipboard piece will fit) then adhere with some glue or Mod Podge to your chipboard.

These are the ones I made:

Crate Paper Magnets

Step 2: Cut off the excess paper and then sand right around the edges to give a nice finish to your circle. Machine stitch around a few of the papers edges and around the perimeter of the circle.

Step 3: Add some word stickers, rhinestones and embellishments like butterflies or hearts.

Crate Paper Magnets Detail

Step 4: Apply a light layer of Mod Podge over the whole circle to seal everything and then once the Mod Podge is dry, adhere the magnet to the back of the chipboard with a hot glue gun.

These cute magnets will be gifted to a couple of my girlfriends for Christmas who always love receiving a handmade gift from me!

I hope I have inspired you to get creating too, thank you so much for stopping by the Papercut Labs blog today!

Happy creating!
— Tarrah x

08 Oct

Give us a smile! [layout share]

Hi everyone! It’s Tarrah here with you today posting my first post as part of the Papercut Labs Blogging Team!

I am so excited to be here!! So I thought I would start off by sharing a layout with you all. I was totally blown away by Jen Hall’s beautiful projects and all her wonderful techniques she shared in her ‘Colour Series’ classes held right here at Papercut Labs. I was super inspired by Jen’s  ‘Water’ class and her Stamp’ class that I wanted to have a play straight away.

Smile Collage

I created a collage of pictures above of the creating process. I used Heidi Swapp Color Shine for my watercolour and misting techniques.

Smile

I used a mixture of different brands of stamps and inks including stamps by Darkroom Door, Kaisercraft and Pink Paislee, while the inks I used were Heidi Swapp, Staz-On and Versacolour.

Smile Detail 5

I used some of the 6 x 6 paper pad papers from the bright Heidi Swapp ‘Favorite Things’ collection. I also added some washi tape, thread, a flair, enamel dots and wood veneer to give so more texture.

Smile Detail 4

I almost always use a doily and/or a pocket/bag for extra layering on my layouts. I love the dimension they give.

Smile Detail 2

I don’t use mediums and stamps very often on my layouts (I’m too impatient lol!) but I just love it when I do!  Thank you so much Jen for sharing your amazing talent with us in those wonderful classes.

And thank you so much for stopping by the Papercut Labs blog. I will be back really soon, but until next time: happy creating.

Tarrah x